Topic outline

  • Introduction

    Arduino Uno

    • Hey there! 👋

      Welcome to the world of Arduino! You're in for an exciting journey.

      What is Arduino?

      Arduino is like a tiny computer that you can tell what to do! It listens to instructions you write and then makes things happen—like turning on lights, making sounds, or moving robots. We call it a microcontroller.

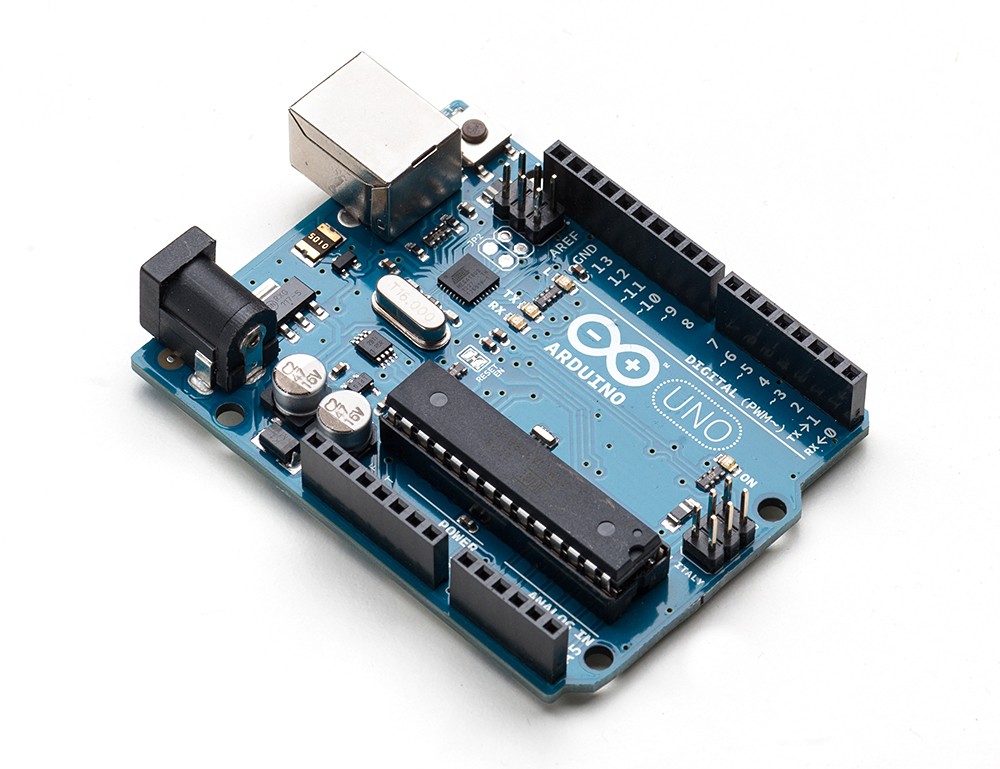
      We’ll be using the Arduino Uno to start with—a popular beginner board that’s perfect for learning. It has little metal pins that you can connect to sensors, LEDs, buttons, and more. One you understand the basics, there are various types, models and functionalities of microcontrollers you can experiment with.


      What You’ll Learn today:

      • What Arduino is and why people love it

      • What the Arduino Uno looks like

      • What you can make with it (hint: robots, games, alarms!)


      📺 Watch this video to see Arduino in action:


      Video Credits: @CircuitSchools

  • Installing the Arduino IDE

    • Ready to plug it in and start coding? Let’s go! ⚡

      What You’ll Need:

      • An Arduino Uno board

      • A USB cable (the one that fits your Arduino)

      • A computer (Windows, Mac, or Chromebook)


      Steps to Get Started:

      1. Download the Arduino software (called the IDE) from https://www.arduino.cc/en/software

      2. Install the software by following the instructions on the screen.

      3. Plug in your Arduino Uno with the USB cable.

      4. The light on your board should blink—yay, it’s alive! 🎉


      📺 Watch this step-by-step video:


      Video Credits: @ProgrammingKnowledge2

  • Blink - the "Hello World" for electronics

    • Let's make your Arduino blink its built-in light! This is like saying "Hello!" in Arduino language.


      🔌 What You'll Do:

      • Write a simple program to blink the LED.

      • Upload it to your Arduino.

      • Watch the light blink on and off!


      🧰 What you'll need:


      📝 Steps:

      1. Open the Arduino IDE.

      2. Write the Blink Code:

      void setup() {
        pinMode(LED_BUILTIN, OUTPUT);
      }
      
      void loop() {
        digitalWrite(LED_BUILTIN, HIGH);
        delay(1000);
        digitalWrite(LED_BUILTIN, LOW);
        delay(1000);
      }
      

      3. Upload the Code: Click the right arrow button to upload.

      4. See the Magic: The LED on your Arduino should start blinking!


      🎥 Watch and Learn:


      Video Credits: @Science.Buddies


  • Playing with Sensors and Buttons

    • Now, let's add a button! You'll press the button to turn the LED on and off.


      🧰 What You'll Need:

      • A pushbutton

      • A breadboard

      • Some jumper wires

      • A 220-ohm resistor


      📝 Steps:


      1. Set Up the Circuit:

        • Connect the button to your breadboard.

        • Wire one side to pin 2 on the Arduino.

        • Wire the other side to ground through the resistor.


      2. Write the Code:

      const int buttonPin = 2;
      const int ledPin = 12;
      int buttonState = 0;
      
      void setup() {
        pinMode(ledPin, OUTPUT);
        pinMode(buttonPin, INPUT);
      }
      
      void loop() {
        buttonState = digitalRead(buttonPin);
        if (buttonState == HIGH) {
          digitalWrite(ledPin, HIGH);
        } else {
          digitalWrite(ledPin, LOW);
        }
      }


      3. Upload and Test: Press the button and watch the LED respond!


      🎥 Watch and Learn:


      Video Credits: @Science.Buddies

  • Completion

    • 🎉 Congratulations! You've just completed your first steps into the world of Arduino. Keep experimenting and have fun creating amazing projects!

      Click to find more components for Arduinos here.